


- Category: Campervan
- Written by Paul Chubb
- Hits: 681
How to construct a fridge slider

Fridges are essential to the well being of travellers in a campervan. You could use an ice box however the food is at risk of getting wet and you have to drain the water somehow. In this article we follow the construction of a fridge slider designed to store the fridge under the bed.
A fridge slider essentially transforms your portable fridge, or ice box, into a drawer that can be hidden out of the way until the food it stores is required. You can buy small fridge sliders starting around the $300 mark and going up. Generally the cheaper ones are for small fridges. I have a big fridge and little money. For this reason I chose to build my own.

The first design decision was to avoid anything that required precision to provide robust service. Most fridge sliders are designed around either some big drawer rails/slides or some small wheels supporting a rim to the slider. I had trouble finding rails for the right size and in any case they were expensive. I was also well aware that the other main method requires precision – as do putting large rails in place.
The obvious other design is that of a trolley – essentially a platform on wheels. However I wanted to limit the height the slider added to the fridge. I have mentioned before that my vertical space is very limited. At the end of the project, I reckon I will have 230mm between my feet in bed and Abi’s head. So anything that takes from that distance is to be avoided.
I needed clearance under the slider of just enough to allow it to slide. To do this I created a tray for the fridge that was just above the bottom of the wheels where they hit the load space of the van.
I wanted to keep the slider light as I could, so I priced the main body in aluminium. The cost was almost as much as a commercial slider. Instead I settled on making the whole thing out of steel.
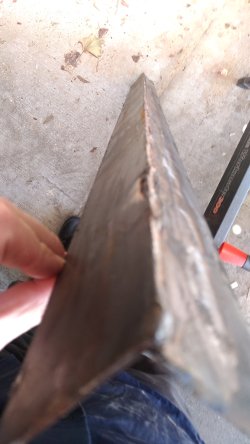
The first step was to create two side rails: 64mm by 50mm angle. I had to weld these from flat bar and of course they warped. The correct way to straighten such warp is to heat and let cool, wedge shaped fillets in the bar opposite the weld that caused the problem. However I found that my torch had too big a head and flame to achieve this. Instead I ended up running welds down the opposite edge of the flat bar to the weld that caused the problem. A bit over half a day later the steel was straight and all the straightening welds, ground off.
I had contacted the manufacturer to ask how this fridge needed to be supported. They, somewhat surprised at the question, recommended three straps of 100mm deep, one at each end and one in the middle. This is where I made a mistake.
The evaKool fridges, like I have, are essentially one of their iceboxes with a compressor attached at one end. The compressor doesn’t go all the way down, so the end strap needed to be under the end of the icebox section. I put it under the compressor and so I had to add another strap at the end to avoid the fridge tipping over.

The steel was all in place producing a very low trolley shaped like an upside down top hat. Along the rim of the hat, in the side rails, I mounted 5 dolly wheels on each side. These were about $1 each from Bunnings. Testing the wheels, I decided they were too low, and so I padded them out another 3mm. Each dolly wheel was welded into place. They couldn’t be bolted through the rim because the bolt heads would interfere with the cantilever arrangement – see below.
The bed frame was about 100mm too low to have the fridge and this contraption under it. It also had the legs in all the wrong places. I moved the outer legs to run in line with the two wheel arches and then put the middle legs just out far enough to contain the slider. At the same time as moving them, I lengthened the legs sufficiently to fit the fridge and slider.
Under the wheels I laid a piece of 50mmx3mm flat bar. Along the side of the cage I ran some more of the flat bar at the height of the slider rim. This meant that it would slide easily without catching.
The final step was to create a cantilever and also to make the slider stop when pushed fully in or pulled fully out.
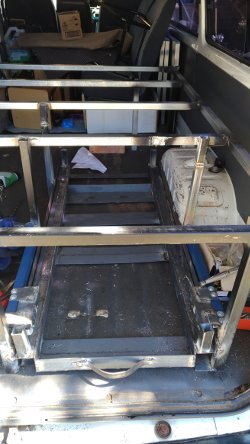
For the cantilever I created two steel brackets just big enough for two dolly wheels back to back. I then added a cross piece to my bed frame at the correct height to attach the bracket to. These brackets were then bolted on using my trusty rivnuts. The brackets with wheels at the front of the cage, stopped the slider tilting too far when fully opened.
To make the slider stops, I simply welded an 80mm scrap of box section to the four corners. This collided with the cantilever bracket, stopping the slider from continuing in that direction.
There are still a few things to be done. I need to clean it up and paint it. I also need to put in place some locking mechanism to stop it rolling when driving. I also need to do the electrics so that the fridge will run.

I haven’t fully decided on how to lock the slider in place. My two main thoughts are a couple of plain padbolts going from the slider to the cage and two toggle latches (Bunnings/Zenith calls these “adjustable toggle hinge”). I wouldn’t buy them from Bunnings they can be sourced very cheaply from Wish or Aliexpress.

