


- Category: Woodwork
- Written by Paul Chubb
- Hits: 2599
Doing the box joint jig
When joining wood to make a right angle, such as the corner of a box, there are several options. Unassisted mitre joints are relatively weak, hard to clamp and hard to cut. Adding dowels or splines just makes the job harder. Dovetails are the ultimate but hard to achieve, requiring high technical skill. So enter the humble box joint. These are medium hard to cut but are common, considered pretty and relatively strong.
To achieve good box joints if you are not a master, will require either a router or table saw and a jig. I haven't built my table saw yet so used my router. Even with the excellent howto at: http://www.instructables.com/id/Make-a-quick-box-using-box-joints/ this takes a little practise. There is a small omission that almost guarantees failure that we will come to later.
 The first step is creating a jig. I wanted to use a simple fence to guide my jig and so it is a slightly different design to the article. First make a braced bookend - that is two pieces of wood butt jointed to form a right angle with a brace/handle in the middle across the two boards. If you use screws or nails, you need to place them with care because you will be running a router bit into one side of the face - see below.
Next choose a straight router bit that matches a purchased dressed all round (DAR) wood size. I used 12mm Tassie Oak which was available at the hardware store. Hardwood is to be preferred since this bit gets a bit of wear. Many plans for jigs like this suggest cutting your own, but since the factory can do it much more precisely than I can, I chose the course of cowardice. Cut two pieces about 100mm long of your DAR.
Examine your router table with your uncompleted jig. Figure out where the fence will go - on my table it was opposite to normal - and the direction of feed. Note the router bit will be the width of the jig less 3 and a bit times your DAR from the fence when the jig is used. So on my jig it is 3x12mm plus: say 40mm. Set your fence so that your chosen router bit hits the jig just inside the outer edge. Adjust the height to match the other dimension of the DAR. Run the jig across the bit making a groove or dado about 50mm long through the face and along the base of the jig. Glue one piece of your cut DAR into that groove making a finger sticking out of the face of your jig.
None of the measurements thus far need to be very accurate. Measurements after this point need to be as accurate as possible.
Once the glue is dry use your spare piece of DAR to set the router bit to one width further in towards the fence than the finger. Be sure to measure against the blade of the bit and not the side. Set the height of the bit to the width of the board you are using - 19mm in my case - and run the jig across the bit until the bit is hidden. Your jig is now completed and your router set up to make box joints
Making a box joint.
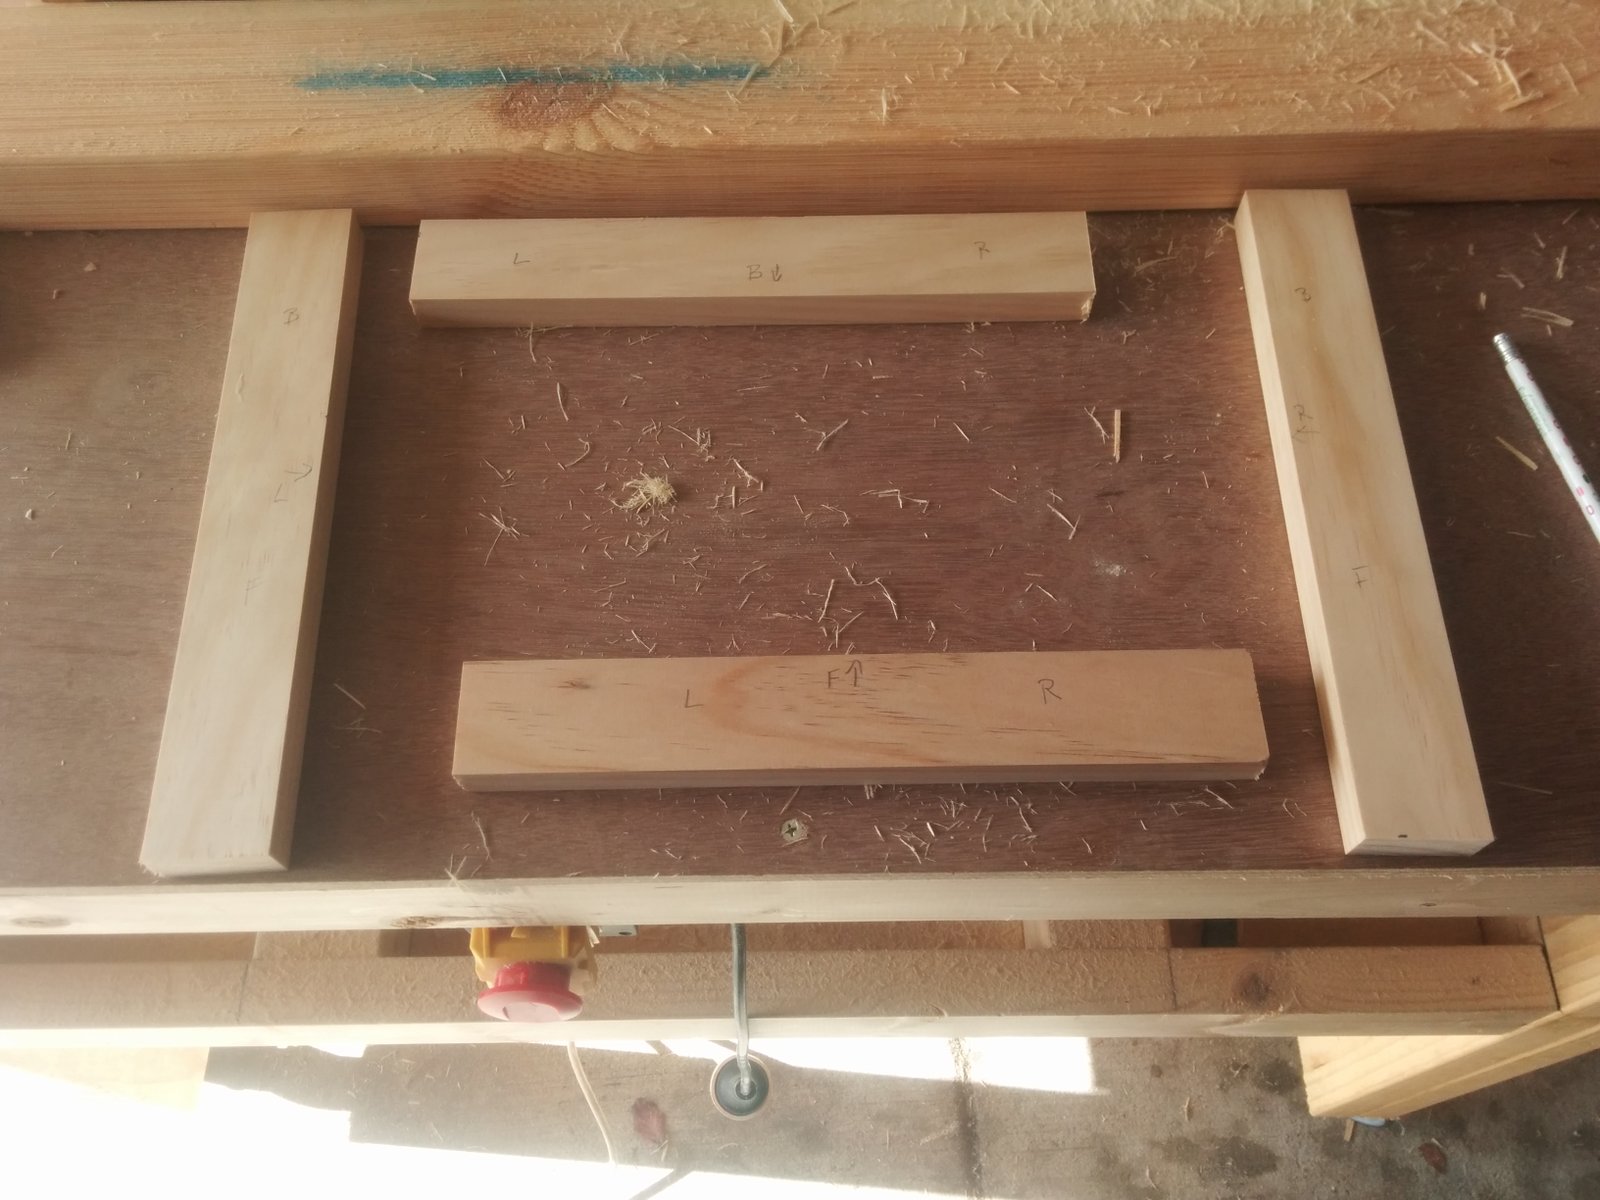 label tops of your four box sides eg: front, back, right and left. Also label the connections eg front to right, right to back etc. This is probably the easiest way to make a mistake - getting the wrong half joint cut on a piece of wood.
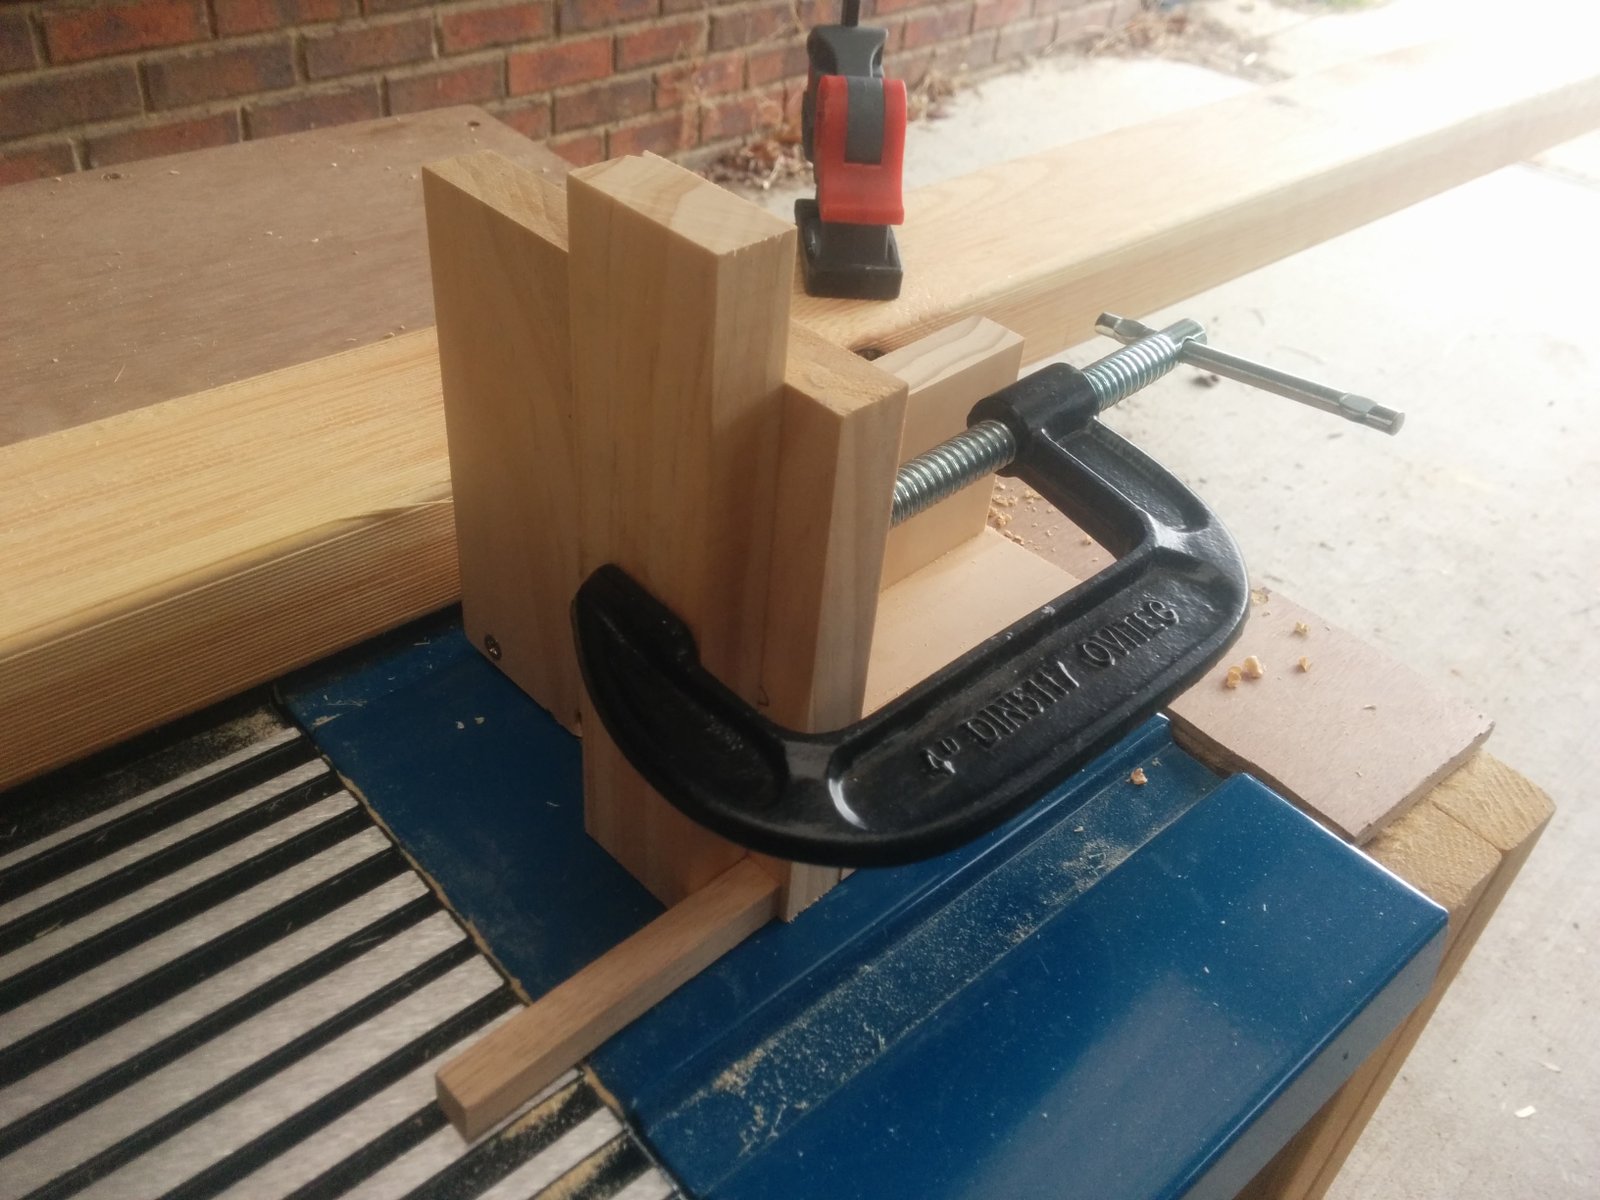
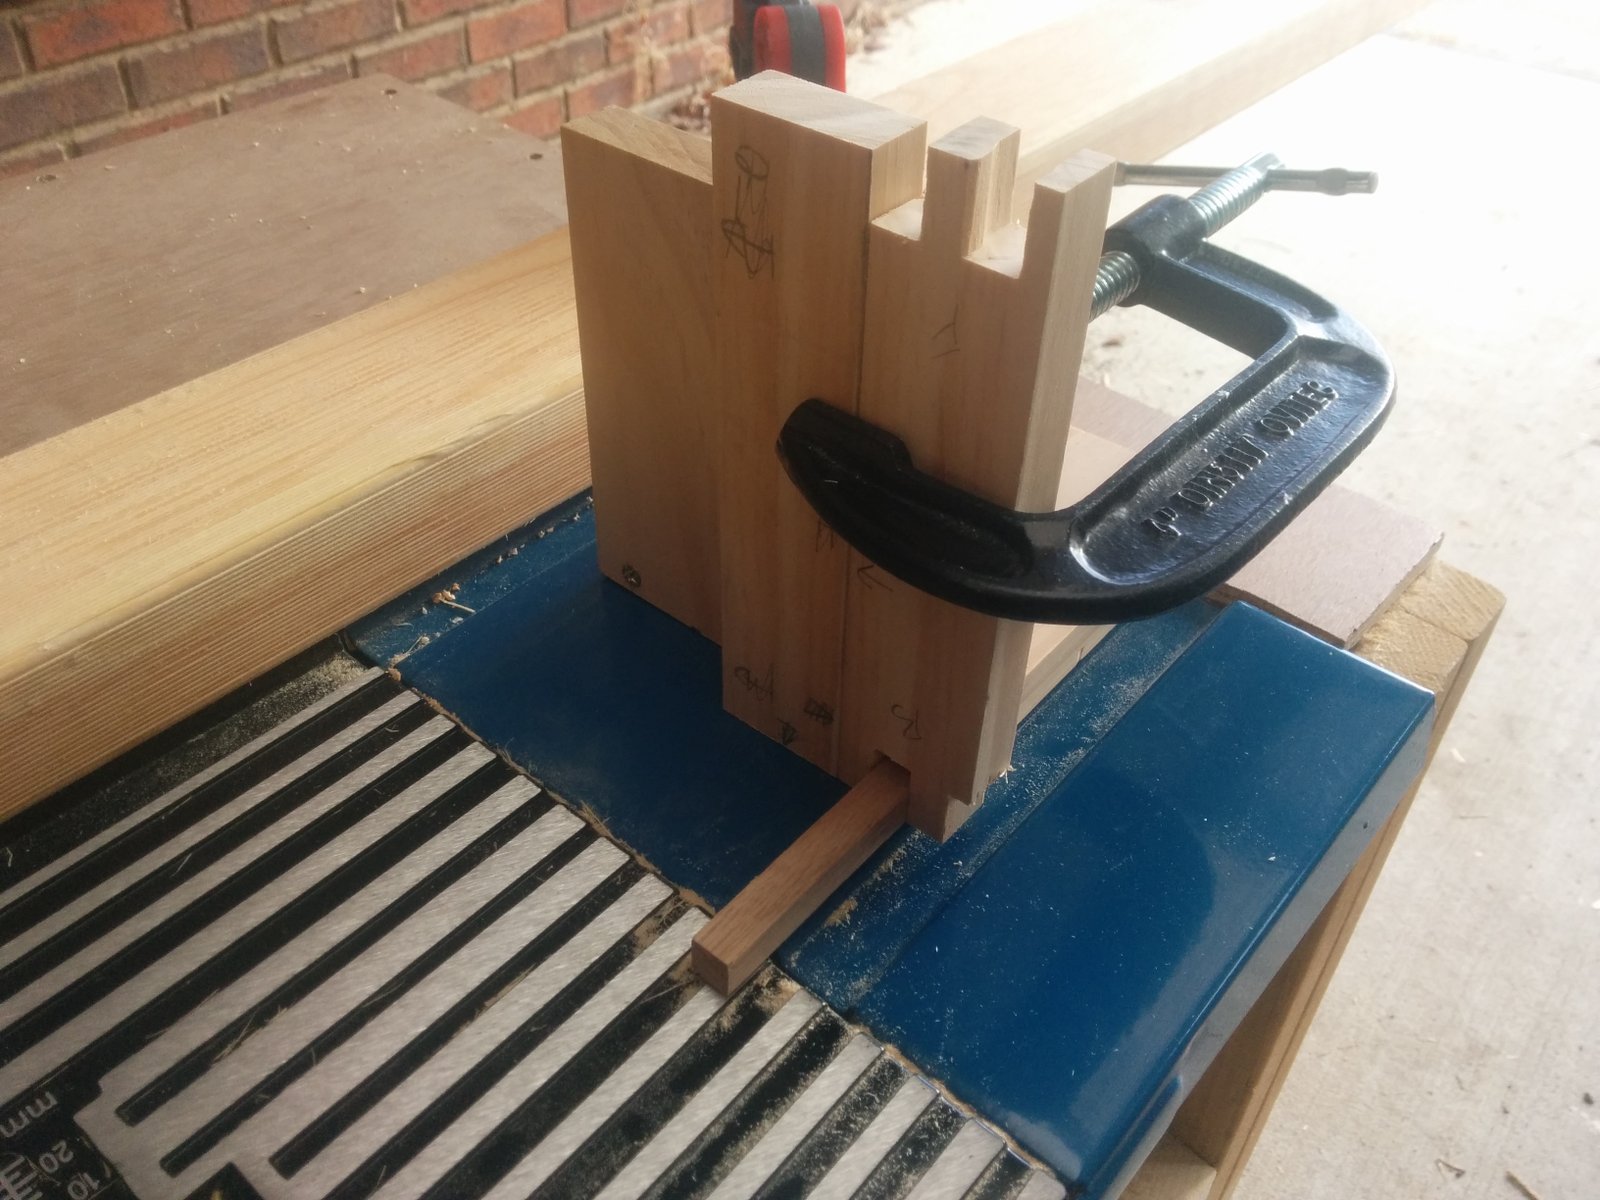
- Choose a side to start and place the top against the jig's finger - the writing may be pointing away or towards the jig it doesn't matter. Make sure that the side is firm against the finger and also flat to the router table. I clamp it in place.
- Run the jig along the fence to make your first box joint cut. Push through until the bit is inside the jig. This will give you a clean cut. Remove the jig and piece from the router bit.
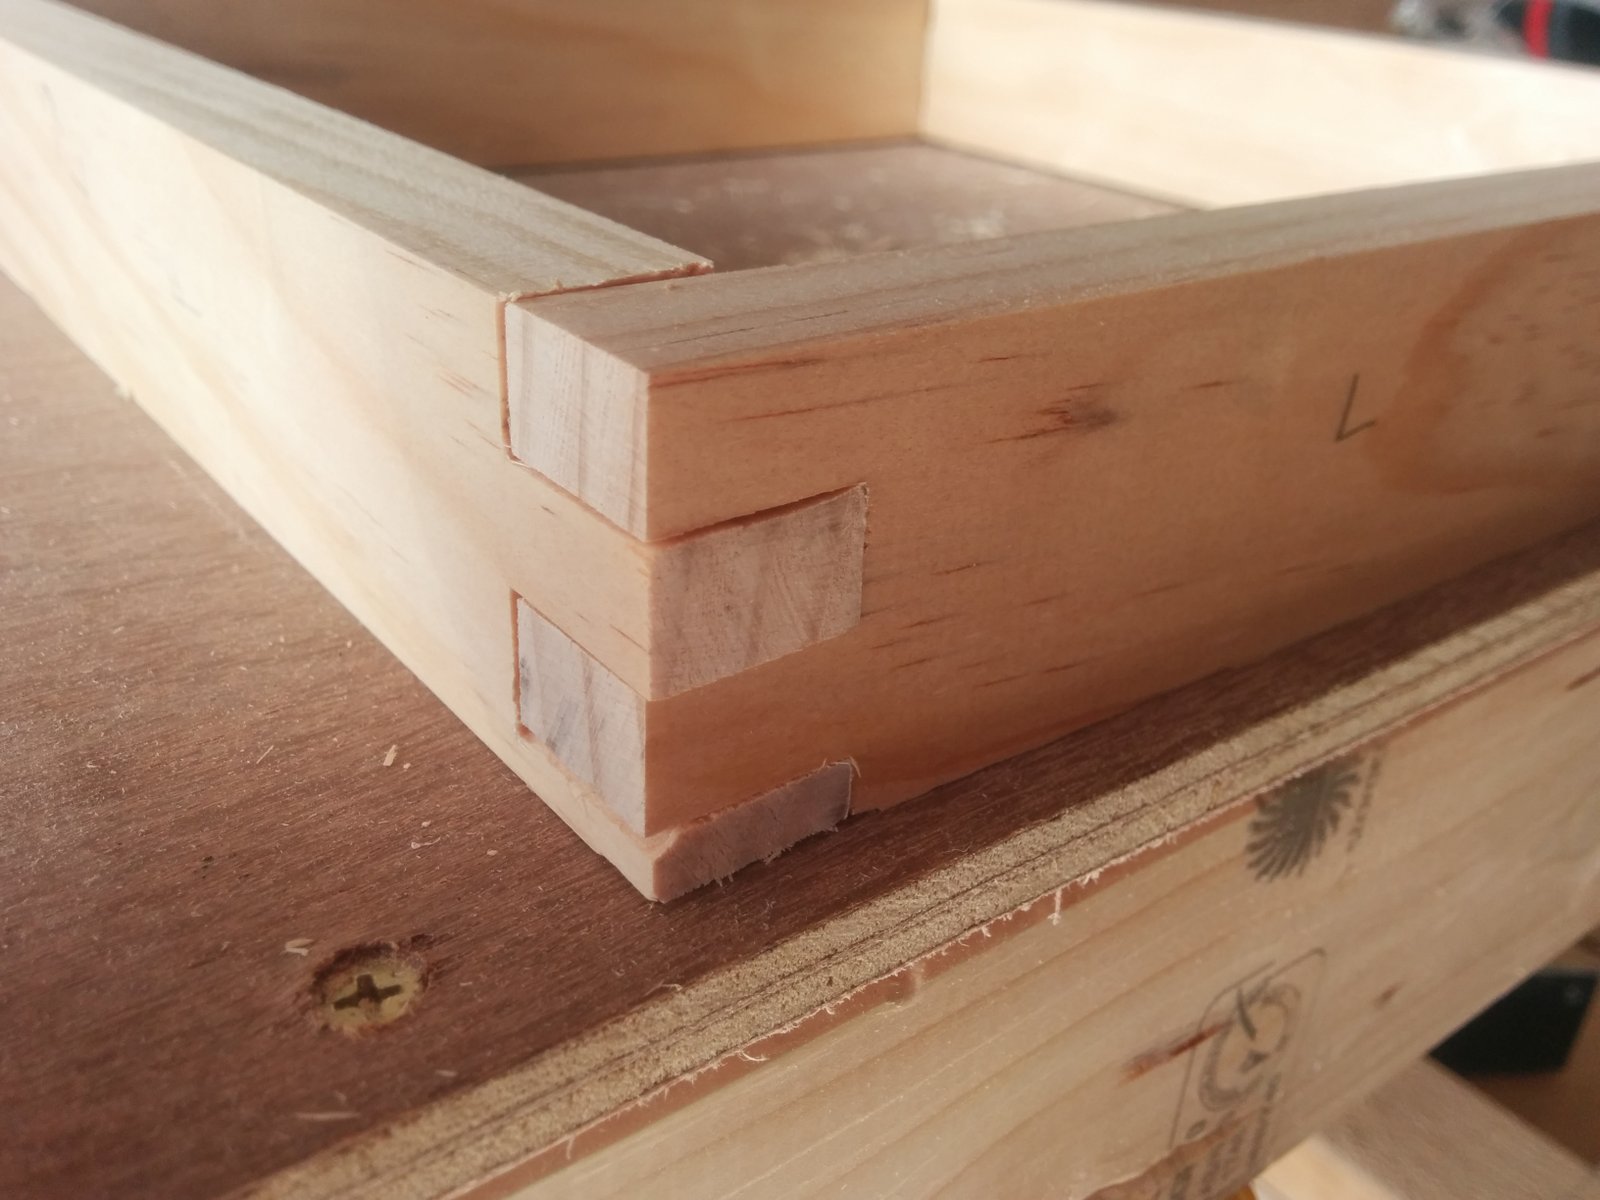
- Move the piece so that the slot you have just cut sits over the finger. Ensure it is square to the table and cut the next. Continue until you run out of piece, the last may be a half slot.
 Find the side and end that mates with the half joint you have cut. Turn the cut piece around and put the slot nearest the top over the finger. Snug the connecting piece up against the cut piece so that the two tops are touching. Ensure everything is square and in place and make your first cut on your new side. This will be a slot but with only one side.
- Snug the slot of the new pieced against the finger and complete the side using the same method as above.
Inaccuracy hunting.
- Are your boards the correct length?
- Is the router bit height the same as the width of the board?
- Did the jig move out of alignment when slid down the fence?
- Did the piece move when routed?
- Is the piece square to the table?
- Is your orientation of the piece correct - top and end?
- Is the jig accurate?
- Is the finger solid in its groove?
I took a day and a half before I got a reasonable joint so expect to practice on scrap. One of my biggest problems was not knowing to start the first piece in a joint with the top to the finger (the how to's omission)..The other trap was not clamping the pieces. My sides were only 40mm wide which is small to hold steady and square. Wider pieces may not need clamping.
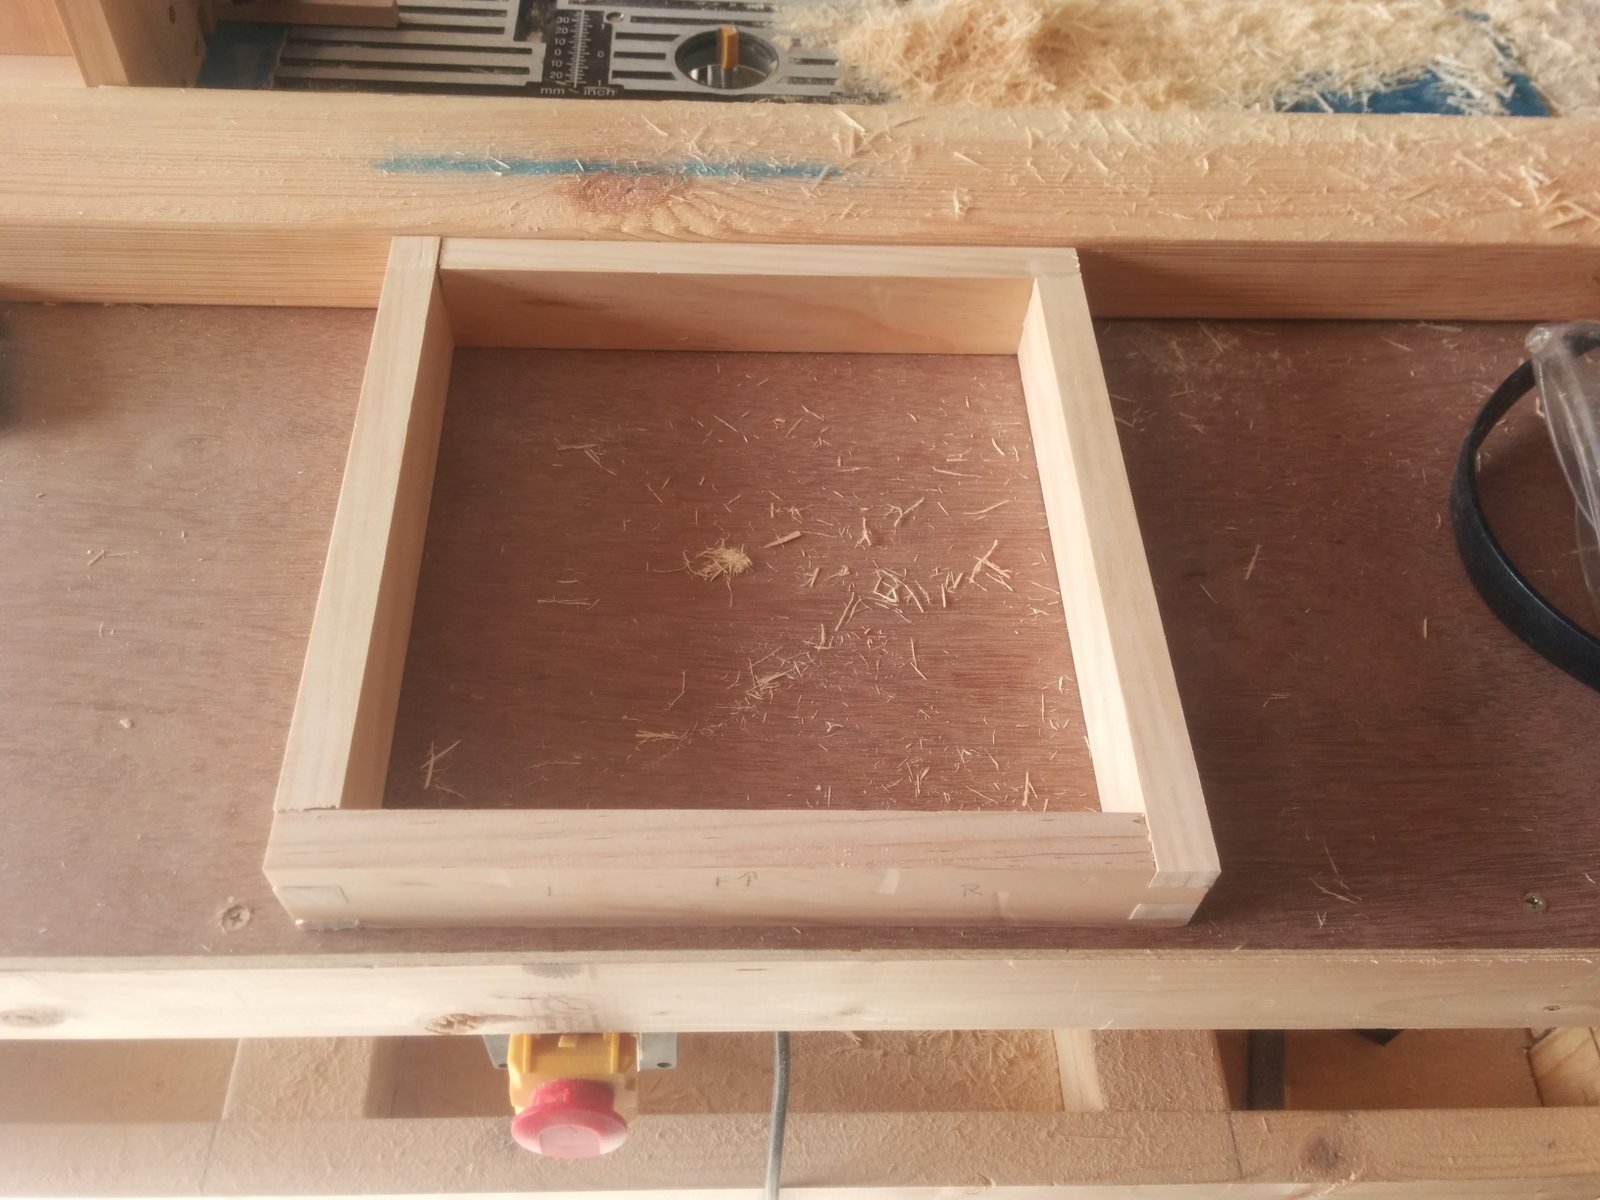
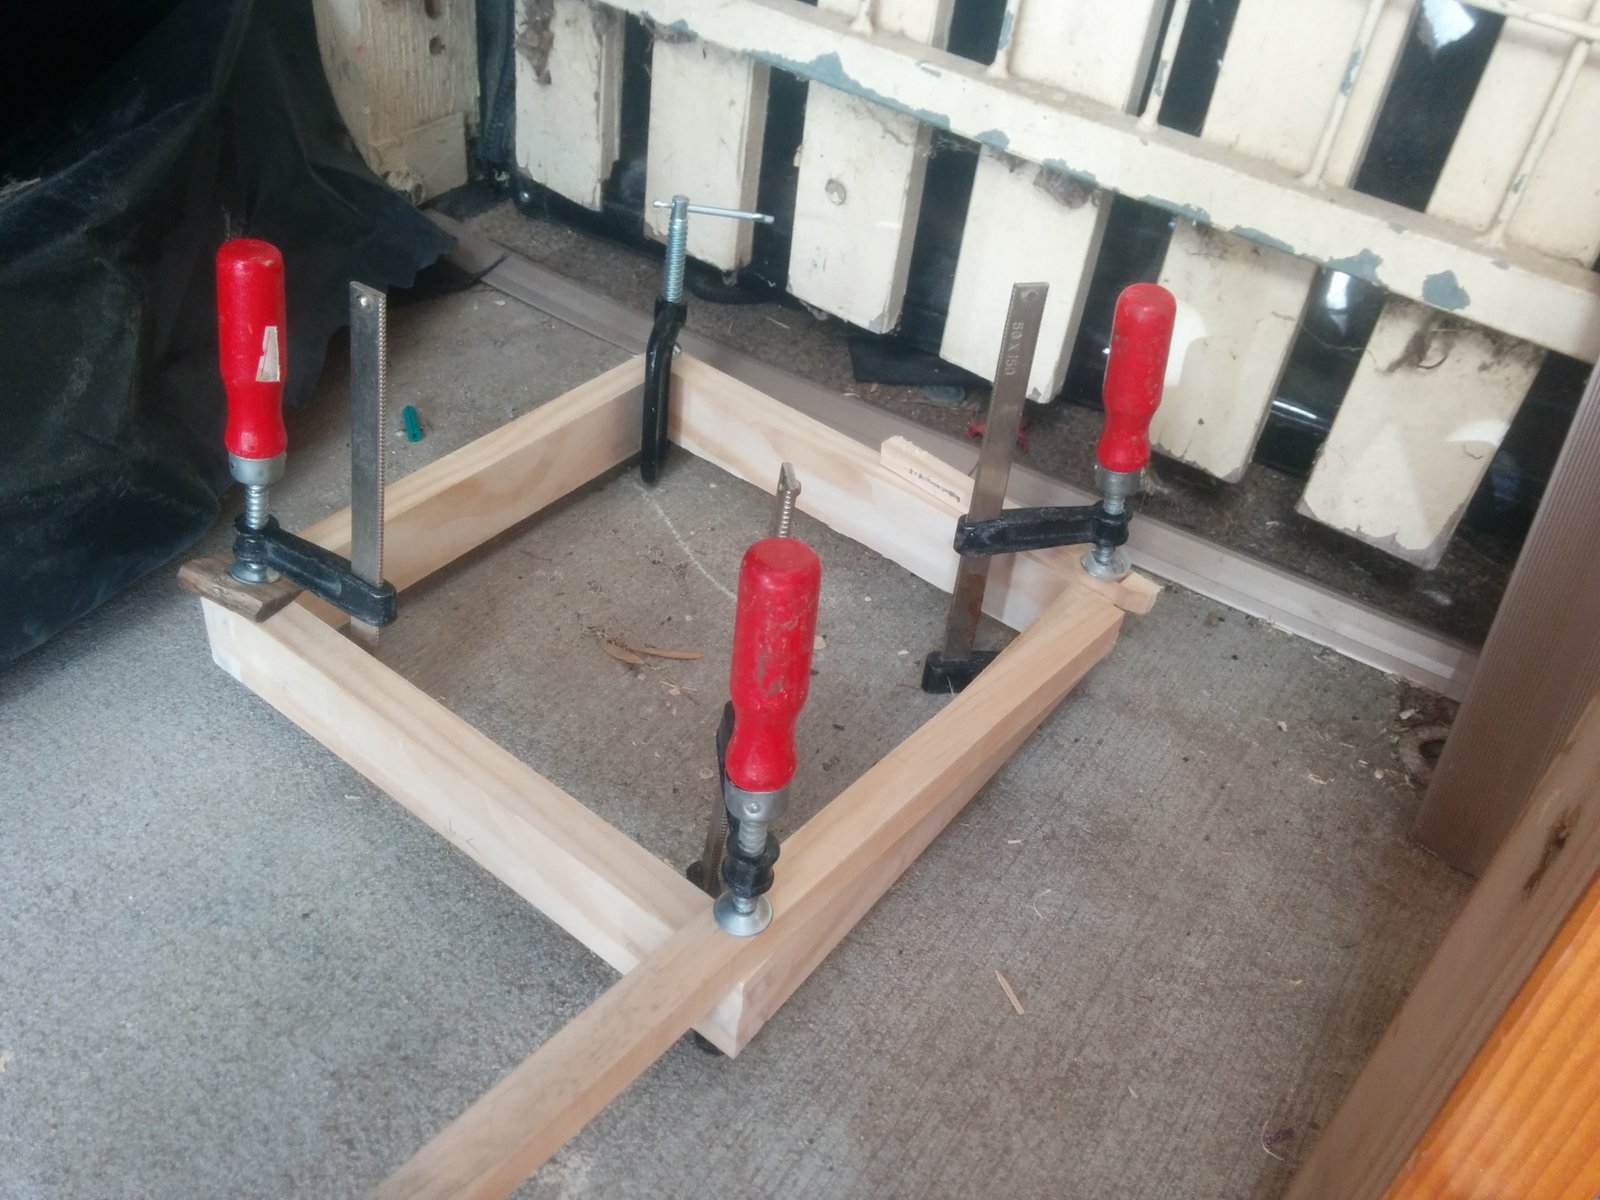
Once the joints are cut you can glue and clamp them. Finally sand all the sides down to remove any last variations.