


- Category: Uncategorised
- Written by Paul Chubb
- Hits: 1143
Aldi 3d Printer and Slic3r
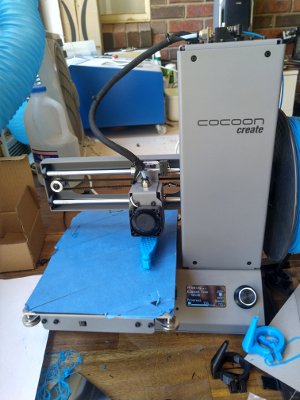
Aldi in Australia have been selling a 3d printer as a yearly special for a few years now. It is an Australian brand printer and as an entry level printer is not too bad. It comes with Windows compatible software called Cura. Using Linux exclusively, I needed an alternative. There are several applications that are always mentioned as best of breed. I chose Slic3r. This article discusses how to setup Slic3r and the printer to get good results.
Base Configuration
According to Whirlpool the Cocoon printer is a rebadged Wanhao. So the first step is to load the Wanhao Slic3r configuration. The bundle can be found in several places on the internet. I used this link: Slic3r_config_bundle.zip
In Slic3r under the file menu, load the configuration using the "load configuration bundle" option. Then stop and restart Slic3r for the new configuration to take effect.
This configuration file will add 3 print setting profiles - course, normal and fine; one filament setting - Hatchbox PLA and a printer profile for the Wanhao i3.
Solving Object Not Sticking to the Bed
The biggest issue I had was models becoming detached from the print bed. This is a common problem for all 3d printing and there are reams on the internet on how to fix the problem. Different printers have slightly different options to solve this problem. The printer manual suggests a few things. I now reliably get quite complex prints out every time except when I miss a step in my process.
Leveling the bed
All 3d printing appears to require very accurate placement of the print nozzle. The level bed wizard is quite easy to use - the hardest thing is avoiding accidentally moving the bed when turning the thumbscrews. I generally tighten until the paper drags and then back off until it moves with only a slight drag. This will give you the right distance. I was surprised by how much the level changes during each print - so yes you need to do this every print.
Surface
Trying just the magnetic mat, the object rarely stuck. Better results were had from using the glue stick. However, that leaves a build up of glue and adds another consumable. Both the printer manual and the internet talk about using "blue painter's tape". Beyond the jokes about colour aware printers, the issue is using a type of tape that is known to reliably work.
The specific Blue painter's tape that is being referenced is Scotchblue original multisurface tape - model 2090. The other two tapes - that I haven't used but are talked about - are Scotch green multipurpose tape - model 2055 and FrogTape green multisurface. The cost analysis based on Bunning's prices suggest that the wider rolls are cheaper per square metre and the Scotch green is the cheapest. I have only used the 48mm wide Scotchblue. Next time I buy I will get the green 48mm tape.
Note Scotchblue also have three other tapes in the range. The exterior tape is reported as not suitable, I haven't seen anything on the Scotchblue sharp edges tape. There is also supposed to be a high temperature tape which I haven't seen.
The tape is applied diagonally across the magnetic pad with no gaps and no overlaps. This helps to ensure that the tape tends to run in different directions to the actual printing. The tape - from online comments should last between 5 and 20 prints.
Speed
At this stage I reduce the speed to 70% using the console on the printer. I hope to figure out how to do this on Slic3r. The default of 100% tends to cause the object to detach.
Slic3r Tweaks
Printer Tweaks
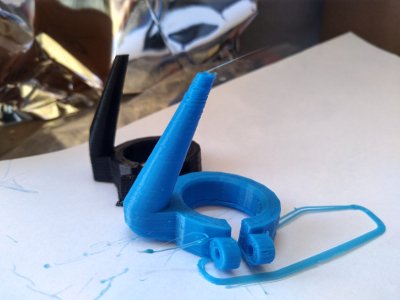
the edge sheered off due to the wrong bed size
You can access the settings on each configuration set by clicking the gear wheel at the end of the individual profile box. Once in the printer settings, you need to:
- set the bed size to 120 (x) 135 (y). Although the bed looks huge, you only use about half of it.
Save the configuration by clicking the little blue floppy disk towards the top left. This setting makes sure that Slic3r places the object in the middle of the print bed when generating the gcode. Otherwise any portion of the object placed outside the print area will not be printed leading to partial objects.
Filament Tweaks
- You can change the colour if you like, but it doesn't make any difference to printing
- The extruder temperature should be 220 degrees for both first and other layers. I found lower temperatures didn't print as well.
- This printer doesn't have a heated bed so set the bed temperatures to 0.
Save the configuration file.
Print Settings Tweaks
There are three profiles: course, normal and fine. I didn't get the fine profile to adhere reliably but you may have more luck. In any case the tweaks need to be applied to each that you are using.
- You need to set brim and skirt. The skirt is a loop around the object that is to get the plastic extruding from the nozzle smoothly before starting on the model. The brim is a wide single layer attached to the model to aid adhesion. When the model is finished, you trim it off. Set the brim to 5 in each of the three boxes.
- If you have edges of your object that are free hanging you will need to enable support material - a single check box
Save each of the configurations.
